Photographing raindrops is one of the many things you can do in the field of macro photography.
What is ISO speed?
10 Important Photography Terms
5 Tips for Still Life Photography
Every day, events in nature happen all around us that seem mundane, but are actually incredible when given a closer look. Take for example a raindrop falling off a leaf after a recent rain -- while that may not seem very interesting when it happens so quickly, it's actually a complicated dance between water, the leaf and the air.
Photography allows us to witness such an event in all its detail and glory. By taking a picture of the raindrop as it falls off a leaf or other surface, we can learn a lot about aerodynamics, the way water moves and even how different surfaces create different shaped raindrops. Whether you're taking a picture of a raindrop on a leaf or on a window, this type of photography will let you create a unique piece of artwork you can keep for years.
Photographing raindrops is one of the many things you can do in the field of macro photography -- shooting photos extremely close up. While point-and-shoot digital cameras can do excellent macro photography, your best bet is to use a single reflex lens (SLR, or the digital DSLR) camera with a special macro lens.
In addition to simply photographing raindrops, we can manipulate backgrounds and surrounding objects to create colors and images reflected in the water. With the right camera settings and tools, expressive and original photos can be easy.
In this article, we'll discuss how to take photos of raindrops and learn more about ways to take incredible pictures of tiny things.

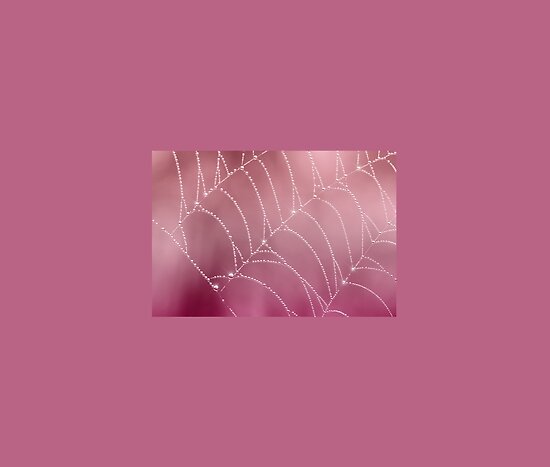
Try to find a raindrop you can shoot through if you want to catch a reflection of other objects in the water.
Raindrop Photography Tips
To start taking raindrop photographs on flowers or plants, you'll need an SLR or DSLR camera with a few accessories. You'll need a tripod that can get close to the ground, a macro lens for shooting close-up pictures and possibly something to hold the object you want to photograph. A good macro setup for a DSLR includes a camera with a lens designed to focus down to 1:1, or life size.
You can wait until after a fresh rain or you could even simulate your own raindrops using a spray bottle or an eyedropper filled with water or glycerin. Glycerin is sticky, so your drop will hold in place longer.
Try to find a raindrop you can shoot through if you want to catch a reflection of other objects in the water. Be careful not to bump the flower or you might lose your selected raindrop. When you're ready, focus your macro lens on the center of the drop.
Now, you should be ready to take your shot. One recommended camera setting is shooting with the aperture wide open to give a blurry background while focused on the drop, and with an ISO of around 100 to 400.
Now let's say that instead of taking pictures of raindrops on a flower or a leaf, we want to shoot a close up of a drop as it falls on a window. Find a clean window with a fairly plain background. You can shoot as the rain is coming down or shortly after the rain has fallen and the drops sit on the window.
Once again, shoot with the aperture wide open in order to keep the background out of focus. If you're using a camera without manual settings, experiment with the automatic settings until you find a way to focus on the raindrops.
In this next section, we'll discuss how to create the illusion of colored raindrops using macro photography.

Raindrops have the ability to reflect and refract images of the objects around them. Because of this, we can create the illusion of colored raindrops fairly easily.
How to Create Colored Raindrops in Photography
We can take photographs of much more than just raindrops falling off plants or onto windows. Because raindrops have the ability to reflect and refract images of the objects around them, we can create the illusion of colored raindrops fairly easily.
Let's start with raindrops on windows. Remember how we said earlier that using the widest aperture possible allows us to obscure the background and focus on the drops themselves? Each raindrop acts like a miniature lens against the backdrop behind it.
By obscuring the actual background image, you can cause it to be reflected into the raindrops themselves. Let's say you have a green forest with a blue sky behind your window -- obscure the background enough and you can cause the raindrops to appear blue and green against a dark background.
Think of it as creating a sort of optical illusion. You can experiment with lots of different backgrounds to generate different effects, like the reflection of a blue object in the raindrops against a light background. This creates the appearance of blue raindrops falling on glass.
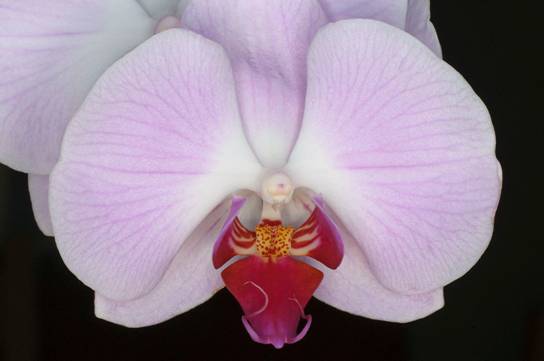
In addition, it's possible to reflect whole images in the raindrop. Let's say you're taking a photograph of a raindrop falling off the petal of a flower, and you want to reflect another object in the raindrop -- in this case, another flower. One way to do this to use a device called a Plamp, a plastic arm-like instrument that attaches to your tripod and is used to hold items in place for picture-taking.
First, focus your macro lens on the center of the raindrop falling off the petal, where the image will appear. Take the second flower and attach it to the Plamp. Now move the flower and Plamp to where it's in a straight line between your camera and the drop. It should be in focus in your viewfinder.
You can also experiment with different images on the Plamp to be reflected in your raindrop. The sky's the limit!


 Lens Shape and ActionExplore how lens shape affects the interaction of light with the lens.